sábado, 21 de abril de 2012

Ensalada con tomates, albahaca y queso mozzarella/ Cherry Tomato Salad with Basil and Mozzarella


Cherry Tomato Salad with Basil and Mozzarella
Servings: 4 to 6
Ingredients
2 pints cherry tomatoes, quartered
1/2 teaspoon sugar
1 medium shallot (or onion), minced (about three tablespoons)
1 tablespoon balsamic vinegar
2 tablespoons extra-virgin olive oil
1 and 1/2 cups fresh basil leaves, torn (don’t chop them-the leaves will oxidize and turn dark icky brown)
8 ounces of fresh mozzarella cheese, chopped into bite-size pieces
Sea salt and ground pepper, to taste
Instructions
1. Toss the tomatoes, 1/4 teaspoon of salt, and the sugar in a medium bowl. Set it aside and let stand on its own for 30 minutes.
2. At this point, the recipe recommends transferring the tomatoes to a salad spinner and spinning them for a few seconds to remove the seeds and extra juice. Make sure you conserve the juice.
3. Put the spun tomato juice/seeds through a fine strainer to reserve the juice and discard the seeds.
4. At this point, heat a medium saucepan over medium-low heat on the stove.
5. Add 1/2 cup of the tomato liquid, the shallot, and vinegar to a simmer. Let simmer until the mixture is reduced to about 3 tablespoons.
6. Transfer the mixture to a small bowl and cool to room temperature.
7. Whisk in the oil and salt and pepper to taste.
8. Add the basil and the mozzarella to the tomatoes. Toss gently to combine.

Huerta en materas/ Container Gardening


Container gardening, growing vegetables in pots


Rats! My word, those little creatures love to climb up to balconies, shimming up walls or drainpipes even, and under cover of darkness they will dig up your container plants, knock them over if small, eat any vestiges of un-rotted compost and nibble roots. Possums, raccoons and similar climbing scallywags can be just as destructive, so get a cat, dog or trap — up to you.

  • To help stop smells from compost, especially if your pots are inside or nearly, and to help control moisture and temperature, put 3-10 newspaper layers on top of soil before you add mulch. This also deters birds from scratching up the soil. Do make sure you check the soil for when to water, just in case it has dried out underneath the paper.


  • It’s all in a day’s work for a lettuce to grow if it has the right conditions. IF you can’t make compost or do any no-dig layer things, don’t worry.
    You may have only a window-sill, a sunny table-top, a neat’n tidy porch and you don’t want mess and muck, in which case buy your organic potting mix by the bag.
    You’ll still get healthy veggies and still the thrill of growing your own.

Watering and feeding Container Vegetable Gardens

Because their roots are restricted, potted veggies need constant vigilance. Watch and correct signs of wilting in particular. It’s so easy for pots, especially plastic pots to heat up and fry plant roots. Clay pots are prone to drying out their soil contents quickly so keep a watering system handy.
Container herbs - growing an indoor potted garden
Preferably set up an irrigation system of small, flexible pipes that drip into each pot when you turn on a tap. Otherwise use a hose or watering can and give your pots their main watering in the morning before the sun gets high and hot.
Just like vegetables grown in the ground, stress by any means, such as lack of water even for a short time, lack of nutrients, cold snaps, blasts of wind and so on, will more often than not result in the vegetable plants producing small harvests, succumbing to disease, or in some varieties, bolting to seed.
Roots go down and out a remarkably long way in most plants when grown unrestricted, so when contained by walls, roots have no means to go further and deeper in search of food and water. Due to extra watering, nutrients get washed away quicker in a container than in the ground also.
Thus as well as watering, regular feeding is a must. Use diluted liquid fertilizer every 1-3 weeks depending on what plants you have growing.
Here are some quick and easy recipes for making compost tea and other liquid fertilisers you can brew up at home in just days or a few weeks.
It is also very important that a mulch is put on top of the container, especially when plants are small, pots are big, and there's lots of soil exposure.
This will slow evaporation and keep the surface temperature of the soil cooler. Plants with smaller, fibrous roots like tomatoes can so easily dry and die in hot soil.
Sharp gravel will act as a mulch and also deters diggers such as squirrels. Some of the rounded or coloured pea gravels are attractive and to a lesser degree will act as a pest barrier, but remember you will be replanting or repotting vegetables often, so will need to remove these sorts of permanent mulches when necessary.

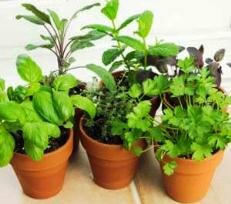
Best Vegetables to Grow in Pots

I never had any luck growing vines in containers. Mind you, I’ve never had any luck making my first $billion... but some people half my age have. So give vines a go if you have LARGE containers... don’t take MY failure to produce anything but miniscule cucumbers and useless marrows as gospel.
Asparagus and corn are tricky, but the darlings are of course tomatoes, spuds, herbs and salad greens. Check out this information from experts on How to Grow Superb Potatoes and Grow Juicy Tasty Tomatoes for growing in everything from tubs, baskets, plots and planters.
And for all vegetables, here’s what you need to know about pot sizes and sorts, and a list of container gardening vegetables to grow.
Growing vegetables in pots, scallions in a container
Picking and eating your home grown food is a pretty special feeling.
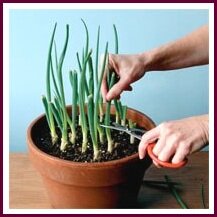
Do remember that a regular commitment is particularly important when growing vegetables in pots, all the more when everything is in full swing in summertime.
Give your plants that 5-15 minutes quick check most days for watering, re-potting, and general once overing to avoid trouble and waste later.

via :http://www.no-dig-vegetablegarden.com/container-vegetable-gardens.html

viernes, 20 de abril de 2012

Trucos para plantar papas/ Great tips for planting potatoes.

great tips for planting potatoes.


Planting Potatoes: Tips from a Master Gardener


Potatoes are an easy crop to grow and are one the the first things that can be planted in your garden. They can be planted at least a couple of weeks before the average last frost in your area and even earlier if you mulch with straw to protect tender shoots. A common misconception is that potatoes are a root crop. Actually the part that we eat is called a tuber, which is a swelling on an underground stem called a stolon. The tuber is an energy storage organ for the plant. Your best bet is to purchase “seed” potatoes that are certified. If you plant last years crop you may be planting last year’s disease problems. Ordinary grocery potatoes are sprayed with sprout inhibitors so they may not grow or be slow to sprout. Choose potatoes that appear healthy and firm.
Potatoes are in the Solanaceae (nightshade) family and are related to tomatoes, peppers, and eggplant. Since they are related, they can share some of the same diseases and pests as their cousins. A good practice is to plant members of this family a distance from one another and also avoid planting them in soil that was used the previous year or two from another family member.
Very small potatoes can be planted whole, but larger ones should be cut into pieces with 2-3 eyes on them. An eye is a small depression that will produce the shoots.

Any potatoes with obvious disease issues when cut open should be discarded. Cut pieces should be allowed to air dry 24-48 hours prior to planting in order to “heal” the surface. This practice reduces the likelihood that bacteria and fungus in the soil will infect the potato.
Potatoes should be planted 3-5 inches deep (I prefer about 5″) and can be planted in a row or in a grouping.


If planting in rows they can be spaced about 12 inches apart and rows at least 24 inches apart, if in a grid or grouping about 20 inches apart is better to allow room for tuber formation. In loosened soil, dig a trench or holes and mix in some compost, blood meal, or bone meal. After incorporating your fertilizer, drop in your potato pieces (cut side down), cover with soil, and water moderately.
Once the sprouts are about 6-12 inches high you can begin hilling up (mounding soil around the plant) so the tubers will have room to grow and not be exposed to sunlight which can cause the tuber to form alkaloids, a mild toxin. Hill 3-4 inches of soil around the stem 2-3 times during the season.
Not many things can compare to that first meal of new potatoes from your garden. Boil them until tender, slather on a little butter, sprinkle with a little salt and pepper, and you are in potato heaven.

via: http://www.greenbeangardens.com/planting-potatoes-tips-from-a-master-gardener/